Users
About End User Accounts
In ActionKit an email address is a user. Your end users correspond to email addresses that have taken some action with your organization. End users are added to your database when they take action on a page, or when you add them using the uploader or the API. It is not possible to associate multiple email addresses with one person in ActionKit.
You can manage these accounts from the Users Tab. From this tab you can search for end users, edit their information, and manage past actions and donations. You can also create custom user fields and import new users or upload data for existing users.
You can reach an individual user record using either of the search methods below.
Subscription Status
The records show whether or not each user is mailable. You can see a user’s subscription status in the core_user table. The options are:
subscribed: The user is mailable. You’ll see a “Subscribed since” row with an unsubscribe link below it.
unsubscribed: The user clicked submit on an unsubscribe page or marked your email as spam. If a user marks your email as spam, they will have a source of ‘mailing’ in
core_actionfor the unsubscribe and themailing_idwill be recorded. See below for how we deal with spam markers.bounced: The user’s internet service provider sent a message in response to your email saying this user’s email is permanently unusable. We don’t record “soft bounces” where the ISP indicates the email address is temporarily unavailable.
never: Only relevant for users who have been imported. If you set an import page to leave each user’s subscription status alone, ActionKit will still create users for email addresses in your file that don’t yet exist in ActionKit – these users will get a subscription status of “never”.
blocked: The user has subscriptions, but their email domain or address is blocked via the email blackhole feature. Often, these blocks are of emails at typo domains, done to improve deliverability. If you unblock their domain or address, their status will change to ‘subscribed’.
Note
Users who have marked one of your messages as spam never receive future email from you, including after action emails. If a user marks your message as spam, and then takes action on a page, they will not receive the after action message.
SparkPost is the email service provider we use to send your email. SparkPost maintains a list of folks who report a message as spam, in parallel with ours. They automatically suppress any messages sent to those emails and re-report the spam unsub to us.
So if folks are rejoining the list that have reported spam, you’ll see multiple spam reports, but only the original one actually impacted your deliverability. Later ones are, essentially, echoes of the original one.
User Search
Basic Search
You can perform a quick search from the Users Tab. Enter the relevant information for any of the following fields in the search box in the top right of the screen:
Name - Enter the user’s first name, last name or both. Searching by both is fastest. The results only include exact matches. For example, searching for Jen won’t return any Jennifers.
Email - Enter the complete email address. Results only include exact matches.
User id - Enter the complete user id. Results only include exact matches.
Zip code - Put the zip in quotes. Otherwise you’ll also find any email address that happens to include the digits in the zip code.
User field value - Enter the custom user field name and the value you want to find. For example, if you have a custom user field called occupation, you can enter
occupation=doctorto find all users with that as their occupation. You don’t need to use quotes around the field name or the value.
Click Search. You’ll land on the search results screen where a list of matching users is displayed.
Advanced Search
Advanced search provides considerably more options than a basic user search.
To perform an advanced search:
Click the Advanced Search button at the top of the Users column on the left.
The default is All records which will show you all the users in your database. To limit this Add a Filter by selecting from the dropdown. You can set a sort order if you’d like. Then click Search. Your results are returned on the search results screen.
Filter Options
The filter options are taken from those found in the Users query builder. All filters include some common controls:
Click on the × icon to remove a filter.
Click and drag the ≡ to change the order in which the filters appear.
To exclude rows based on a filter, click on the green Required button to toggle it to Excluded.
Many filters include variables that you can adjust. You’ll see these as soon as you select the display.
For example, if you select the display type Number of Actions, you’ll see a dropdown with All Actions selected by default. You can change this to:
Completed Actions - only those with a “completed” status in core_action.
Non-Spam Actions - only those not designed status=”spam” in core_action; only relevant if you’ve enabled spam checks.
Spam Actions - only those with a “spam” status in core_action, only relevant if you’ve enabled spam checks.
Advocacy Actions - status completed and action on one of the following page types: LTE, call, petition, letter, whipcount.
Non-Import Actions - status completed and action on any page type except Import.
Also Told A Friend - action on any page where the user sent at least one TAF email through the TAF widget. Does not include social media sharing.
You’ll also see options for restricting the time period of the actions (e.g. today, last year, custom range, etc.) and specifying the action count.
To see a list of the choices and the corresponding SQL for any of the available filters, view the Query Builder SQL Reference.
There are some filter options in the query builder that aren’t here (e.g. SQL expressions and row limits). Also, blank fields are treated as empty values instead of as parameters.
Custom Search Queries
On the Pages, Mailings and Users Tabs, you can define and save searches that will return a matching list of pages, mailings and users, respectively, in the Tab’s list layout.
Custom Search Queries are query reports saved with the relevant tag. You may want to create one to save time if you often use the same criteria under Advanced Search. Or, if your Advanced Search times out, you may be able to write more efficient SQL that will complete. Advanced Search uses the query builder, which is designed to accomodate many possible combinations and therefore writes inefficient SQL.
Defining one or more custom search queries will cause a new section to appear in the navigation links on the right hand side of the tab. Toggle open the Search Queries list to see a list of the defined search queries, then click one to run that query.
Custom search queries can support one or more query parameters to allow search values to be entered. Simply define your parameters as you would for any other query report. When you run a search query, you will be prompted to enter values for any parameters it contains.
The order of objects returned by your query will define the order of the search results, so include an ORDER BY clause to specify your desired sorting.
To create a user custom search query, create a query report and assign the user search tag to it. Use the query builder or write your own SQL. Regardless, the query can only contain SELECT statements. Only the first column returned will be used by the search function, and that first column must be named id or user_id and contain the IDs of the user who match your search.
Search Results
The search results screen displays a list of all users who met the search criteria.
For basic or advanced search results, you can sort your list by any of the criteria in the drop down menu next to Order by. Select Ascending or Descending and click Search.
Shown above the search results are links to display a list of all users in your instance by clicking on the total, or to start a new search by clicking on Advanced Search.
To view an individual user record click on the user email or the Edit link in the Actions column.
Viewing And Editing Users
You can scroll through the user records for each user who met your search criteria using the Previous User and New User links at the top of the screen.
You can edit most user information from this screen, including email and contact information.
The following information is displayed:
User Id and AKID: At the top of the screen is the unique user id and akid. This value for the
akidis part of the string that ActionKit appends to links in mailings so the user is recognized. You can also append the akid to your URLs to view a page as the user.Email: Email address is unique for each user in ActionKit. ActionKit assigns a
user_idto each new email address, whether entered by a user on an action page, imported through the bulk uploader, or added through the API.You can change a user’s email on this screen. However, you can’t change the user’s email address to one that is already in your database. You can merge users if you know that two or more email addresses belong to the same person.
End users can change their own email address from the user update screen. If an end user tries to change their email to one that’s already in your database, the user will need to confirm by clicking a link in an email sent to the new address. The old address is unsubscribed but the two records are not merged (e.g. the action history from the old address is not added to the user record).
Name: The user’s full name is displayed.
Source: The user source is the source of the first action taken by the user.
Subscription information: Displays the user’s current subscription status and list membership(s). The Unsubscribe From All Lists link removes the user from all lists.
Read more about subscription status, including what happens to users who bounce or mark an email as spam.
This section also links to the User’s Mailing History and Manage Subscriptions screens.
Actions: The table below the list memberships includes:
The user’s total action count.
Links to View User’s Action History and View User’s Donation History.
Most recent action taken.
The action that last subscribed the user.
Tags: The Show User’s Tags link displays the tags associated with pages on which this user took action.
Sharing: The sharing table displays:
The count of the tell-a-friend messages the user has sent using the taf widget.
The count of Facebook shares for which the user has clicked to share.
The count of Twitter shares for which the user has clicked to share.
Donations: The donation summary table shows count, total and average of the user’s one-time, recurring and total gifts, including imported donations and excluding $0 donations (usually free product orders). It also shows the user’s highest and second highest one-time donations. See the sample queries for the SQL used to generate these counts.
Recurring Donations: Below the Donations table is a summary of every recurring donation profile associated with the user (if any) with a link to manage the recurring profile.
Dashboard: If you have defined a User Dashboard Report it will appear here.
Address: The user’s address information (if any) is displayed here. ActionKit does some validation of address and zip. Also shown are:
District: The user’s US House district (if the user has a zip) and the House Rep’s name.
Language: Select from the dropdown to change the user’s language (if you have any languages enabled in your instance aside from English).
Phones: This section displays the list of telephone numbers associated with this user. You can only have one phone number of a given type from a given source, meaning you can’t manually enter two home numbers although it is possible to have one home number from the user and one entered by the admin. Possible phone types are Home, Work, Mobile, Emergency, Home Fax, Work Fax and Batphone.
Custom user fields: This section displays all custom user fields with responses for this user, plus any custom user fields set to always show. To add a value just type in the content box. If you’d like to add a value but you don’t see the user field, select the field name from the Add dropdown. You can only enter content for fields that already exist. To add new custom user fields, click the blue and white plus icon, or the Custom User Fields button on the Users tab, as described in Creating custom user fields.
Staff Notes: This section allows you to add notes about this user. Previously added notes are displayed with date, time stamp, and staff account that entered them. Any text you enter into the Add a note… field will be recorded when you click Save. Click Edit to make a correction to a previous note. Editing a note will not change the original date and time stamp. Removing all of the text from a note and clicking Save will delete the note.
Action History
You can view the user’s complete action history by clicking the Action History link. Every action the user has taken is shown, most recent first, with the date, page ID and name, and page type.
If you click on the name for any action, you’ll see the action source, including the mailing_id where relevant, and the values entered for any actionfield associated with the page. If the action subscribed or unsubscribed the user, the list_id (s) will also be shown. Click the Expand All link above the action history table to show the details for all actions.
Since February 2019, you’ll have the option of re-sending the confirmation email for recent donation and event creation actions.
Click Event Page in the Info column to open the host page of this user’s event.
You can also use the links in the Info column for managing donations or past actions.
Donation History
You can view the user’s complete donation history by clicking the Donation History link. Every donation, attempted donation, and recurring payment for the user is shown, most recent first, with the date, order ID, activity type, status, amount, any additional information for the transaction, and action links.
If you click on the row for any transaction, depending on the type of payment (one-time vs recurring) you will see additional information about the transaction, including:
Payment processor
Recurring profile ID
Recurring profile start date
Recurring profile status
Recurring profile total paid
Transaction ID
Action ID
Page title and ID
Action field(s)
Candidate(s)
Source
You will also have the option to re-send a confirmation mailing for that donation if a donor has misplaced their original confirmation mailing receipt. Confirmation mailings can only be re-sent for a limited time, and are only available since February 2019.
Click the Expand All link above the donation history table to show the details for all donations.
You can also use the links in the Actions column for managing donations.
Mailing History
You can view the user’s complete mailing history by clicking the Mailing History link.
This screen displays a mailing contact summary table as well as the most recent 100 mailings that have been sent to this user and shows total opens, clicks, actions, gifts and TAF sends from these mailings. Click the Expand All link above the mailing history table to show the details for all mailings.
Scroll to the bottom of the list for a link to see the full mail history for this user.
Manage Subscriptions
You can view the user’s subscription history and add and remove them from specific mailing lists by clicking the Manage Subscriptions link.
The first portion of this screen shows the mailing lists the user is currently subscribed to, with an unsubscribe link for each.

If there are mailing lists to which the user is not subscribed, you will see an option to add the user to that list.

Below that is a list of the user’s mailing list subscription history, showing the dates on which the user was added or removed from mailing lists, and what prompted the change.

- The following is a list of all available options for the subscription status change:
Subscribe
Subscribed by Admin
Subscribed by API
Subscribed by Import
Subscribed by Uploader
Subscribed by User Merge
Unsubscribe
Unsubscribe Admin
Unsubscribe Bounce
Unsubscribed by Feedback Loop (Clicked Spam)
Unsubscribed by Import
Unsubscribed by Re-Engagement
Unsubscribed by Spam Check for Actions
Unsubscribed by User Merge
Re-Subscribed by Admin, undo Spam Check
Put on Re-Engagement List
Engaged, so Moved off Re-Engagement List
Managing Donations
Your database may include donations processed through ActionKit or externally. Donations are managed differently depending on where they were processed.
Donations (one-time and recurring) that came through an ActionKit page into your merchant vendor account should always be managed through ActionKit. This is also true for recurring profiles set up outside of ActionKit with one of the merchant vendors we support that you’ve imported. And, it’s true for PayPal, if you’re using our PayPal integration. If you make changes directly with your merchant vendor they may not be reflected in ActionKit.
To manage these donations, go to the user’s Donation History screen (reached by clicking View User’s Donation History on the user’s record) and use the links in the Actions column. There are also links to Reverse and View payments through the user’s Action History screen (reached by clicking Action History on the user’s record). The links are:
View Payments: This link appears for recurring payments and takes you to the recurring profile screen to manage the profile and view all the payments associated with this recurring profile.
Reverse Payment: When you fully reverse a one-time payment or the initial payment when a recurring order is created, status in
core_orderwill change to "reversed”. Sometimes, you can use this link to issue partial refunds, discussed below, as well as full reversals.Cancel Recurring: Clicking this link will ask you to confirm the cancellation of the recurring profile.
Re-send Confirmation Mailing: Clicking this link will re-send the confirmation mailing the donor received after their donation. Use this if a donor has misplaced their original confirmation mailing showing their donation details.
Warning
If you’ve made changes to a donation, those changes will NOT be reflected in the re-sent confirmation mailing. The confirmation mailing you can resend is an exact duplicate of the original.
Note
Re-sending a confirmation mailing is only available for donations made on or after February 2019.
External Donations: External donations must be managed through the relevant vendor. For example, ActBlue donations can only be refunded through ActBlue. You’ll see a link on the user’s Donation History screen to reverse the payment as described above, but this doesn’t prompt a refund. It just changes the payment status to “reversed” in the ActionKit database to reflect what has happened at the vendor. The same is true for donations imported against an import stub account.
Partial refunds
ActionKit currently only supports partial refunds for the Braintree payment processor, and only after the initial charge settles, which normally happens overnight. (ACH Direct Debit donations can take three days to settle.) From the user’s Donation or Action History screen click the “Reverse Payment” link, this brings you to the “Reverse Donation” screen and if the donation has settled, you’ll see a link at the bottom to “issue a partial refund”.

Click the “issue a partial refund” link and a box with the amount available for refund will display. We subtract any previous partial refunds so you can’t refund more than was donated.

If you can’t issue a partial refund, there should be a sentence in the same place explaining why.
For reporting purposes, ActionKit will reduce the amount in core_order by the amount refunded, and add a row to core_transaction with type='credit' and the amount refunded as a negative value. Starting February 2018, query builder reports and ActionKit built-in reports that calculate payment totals using core_transaction factor in credits as needed. To update any older query builder reports, just open them for editing and press Save.
For custom reports, or modified versions of ActionKit reports, you might need to make changes by hand if you want to correctly count partial refunds. If the report uses core_transaction to generate totals, make sure it uses type in ('sale', 'credit') instead of just type='sale', and use amount != 0 to replace any instances of amount > 0. Some donation reports don’t need changes, like reports that count donors without looking at payment amounts, or reports that only access core_order and never core_transaction.
Recurring Profile
You can reach the Recurring Profile screen by clicking on Manage Profile from the Recurring Donations section of the user record, or by clicking on View Payments from the user’s Donation History screen.
The Recurring Profile screen displays information about the recurring profile including start date, number of payments, sum of payments, current charge amount and the date of the next charge.
You can change the amount, credit card, bank information, or billing address for future payments except for PayPal profiles. The billing address is prefilled from the last saved billing address for this profile, and changes to the billing address are only available for Braintree, Authorize.net, and PayFlowPro accounts.
Note
PayPal does not support changing the amount, credit card, or billing address for future payments. To make any changes to PayPal recurring profiles, cancel the old recurring payment and start a new one.
You can also refund past payments and cancel future payments.
Any changes made will be tracked in the Donation Change Log which notes who made the change and whether it was a staff or the user.

It’s best to manage all of these options through ActionKit, not directly through your merchant vendor account, so the changes are captured in ActionKit and transmitted to the vendor.
Any changes you make from this screen are processed through a page called admin_update_recurring that has the confirmation email unselected. If you want users to receive an email after staff make changes to their recurring profile, you can edit this page and select the confirmation email.
Managing Actions
You can’t modify user’s actions through the user record, but you can delete actions taken on a petition, letter, signup or survey page. To do this, find the action on the user’s Action History screen (reached by clicking Action History on the user’s record) then click delete.
If you delete a user’s action it is removed entirely from the core_action table and cannot be re-instated so you’ll be asked to confirm before ActionKit will delete the action.
Creating Custom User Fields
A custom user field is used to store information about a user. A custom user field defaults to allowing one value; the old response is overwritten every time the user submits a new response. When a custom user field does not allow multiple values, the value will always be overwritten by a user action, in the admin or by import.
To create or edit a custom user field, select Custom User Fields in the Related Tools section of the Users tab, and then click Add allowed user field. Enter the name and other settings for your user field and then save. All of the field defaults, choices, or regex you provide on the “Change Allowed User Field” page only affect the fields on the admin page, not the action page itself.
Note
If you do not select Always Show the custom user fields will only be displayed in the user record if a value has been added for this field.
To add or edit the custom field value for a given user, go to the Custom User Fields section of that user’s record.
Adding User Field Values
In addition to using the API, you have several choices for adding values to a user field:
You can ask users to enter values by including the field in your user form on any page. To do this, you’ll need to customize the fields used on the page, see User Form Fields. Validation and defaults are not applied to custom field values entered by users.
You can enter values yourself through the user record.
You can also import custom user field values from a CSV or TSV file using the uploader. Validation and default values are not applied to imported custom user fields.
The field name, the user response and the user_id (parent_id) are saved to core_userfield, along with a timestamp (updated_at).
Here’s an example of the query you’d use to find each user’s id and response:
select parent_id as 'user_id', value as 'pets'
from core_userfield
where name='pet_name'
Join to the core_user table on parent_id=core_user.id to get user’s name or email.
Note
updated_at was added to custom user fields in Spring 2020 and will be blank (NULL) for any fields created before this, until they are saved again.
Note
action_id was added to custom user fields in Spring 2020 and will be blank (NULL) for any fields created before this, and for any fields last updated by staff / not updated by an action.
Targeting By Custom User Fields
You can select recipients for a mailing based on the value in a custom user field. There’s a query for this in the query library. Or write your own query to target recipients based on whether they have a response at all.
Importing Data
Imports can be used to add many types of external data to your database. Read more about the options under uploads.
Merging Users
If you know that two or more email addresses in ActionKit actually belong to one person, you can merge these users.
A user merge moves actions, donations, events and subscriptions from one or more users to a primary user you designate, and also copies custom user fields, phones, and an address of your choice. By default, the primary user is subscribed to all the mailing lists any of users are on, but it’s also possible to choose specific lists.
You may find this useful for cases where you have multiple email addresses for a single person. For example:
If a donor informs you of a recent email address change and now has multiple users, you can merge the old user into the new user.
If a user mistyped their email address when taking action, you can merge the action from the bounced user to the correct user.
If a supporter informs you that they’re receiving duplicate email across multiple email addresses, you can combine the records from all the users into just one user.
You first need to identify the users you want to merge. Then follow these steps:
1 Click the Merge Users button on the Users Tab.
2 Enter the IDs for the users to be combined in the box and submit.
3 You’ll see a table of the designated users. Here you must:
Select the user you want to keep. This identifies the email address that the other user’s actions will be moved to. This is the primary user.
Select the mailing address you would like to keep. This address will overwrite the address of the primary user if you select the address of one of the secondary users.
Decide if you want to customize the mailing lists the primary user will be subscribed to. By default, the primary user will be subscribed to any list to which any of the secondary users are currently subscribed, except for the re-engagement list.
4 Preview the merge results or just start the merge. This step will take a few seconds.
Note that only the primary user will remain subscribed to any mailing list. All secondary users are unsubscribed from all lists.
Mailing history and user names are not merged.
Secondary users can be subscribed again if they take action again with the email address you unsubscribed, or if you include that email in an upload through an import page that is set to subscribe users.
We’ve added a new report called Users Taking Action After Merge to help you find (and merge!) these secondary users who have taken action again after being merged, so that you can merge them back into the primary users.
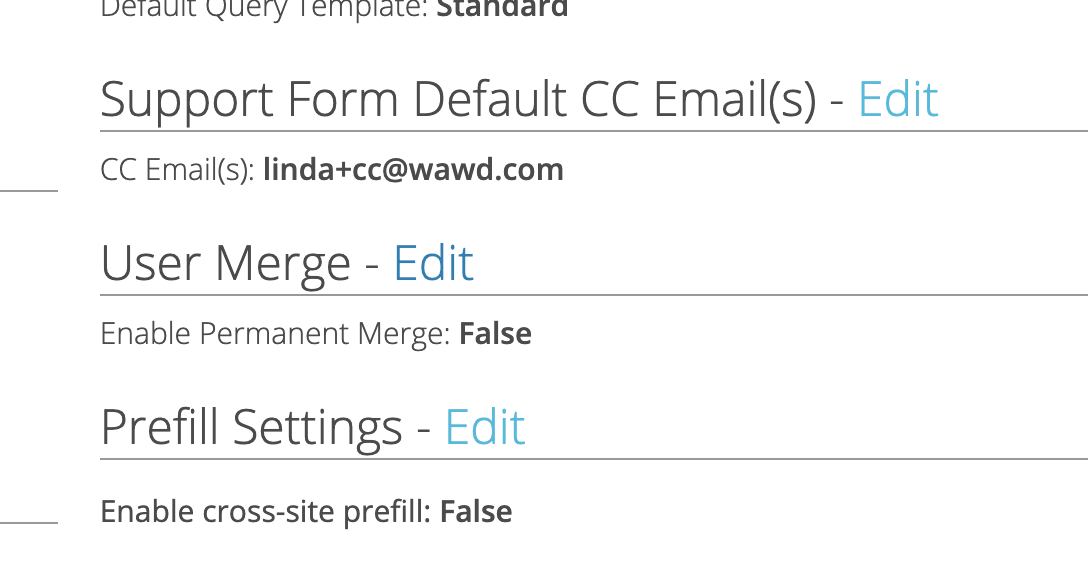
Permanent User Merge
Permanent user merge allows you to set and forget your user merges: we’ll re-merge users after an action so you don’t have to. The re-merge happens automatically shortly after a user takes action using the email address that you didn’t want to keep.
For example, if you’ve merged DontUseThisEmail@example.com into GoodEmail@example.com, and afterwards DontUseThisEmail@example.com is used for another action,
then permanent merge ensures that this unwanted second user quickly and automatically gets merged back into GoodEmail@example.com.
When enabled, all user merges automatically become permanent merges, including those that occurred before permanent merge was enabled in your instance.
Individual users can be removed from the permanent merge by clicking the “Stop Merging” button on the user profile.

Stopping a permanent merge for a user does not reverse previous merges or re-subscribe the user.
Repeat merges are triggered by actions. Changes that don’t originate from an action won’t trigger a merge. That includes staff changing the user’s details e.g. name or subscriptions from the user profile page.
Permanent merge is enabled from the Site Configuration page.
Note
After-action emails such as the confirmation mailing will go to the email used for the action. Once the repeat merge completes, the action and any events, donations, etc will be associated with the user that you’re keeping.
Deleting User Data
At some point you may receive a request, perhaps a GDPR anonymization request, from a user to delete her personal data. In ActionKit this is handled by anonymizing the user’s data while leaving the relationships to actions and mailings intact.
To delete data for a user, first go to the Users Tab. If your account has superuser status, you will see a link to “Erase Users”. Only staff accounts with superuser status can delete user data.
Following the link will take you to a form where you can specify the user whose information you want to erase. On this form you can enter either the User ID or Email address of the user. If you click Erase at this point, the user’s data in the core_user, core_useroriginal, and core_location tables will be cleared. The records will remain to preserve data relationships, but with empty fields.
You can select additonal data to erase on the form. Here are the options:
Order User Details: Checking this will clear any records for this user in
core_order_user_detailandcore_order_shipping_address. As well as data incore_donationattemptlog.args, which can contain the user’s name and email. The orders will remain but without this user data.User Fields: Checking this will delete any custom user fields for this user.
Action Fields: Checking this will delete any custom action or event fields for this user.
Transactional Mailings: Checking this will clear the
emailfield from any records for this user incore_transactionalmailingssent.
A record of all erased users is kept in the eraser_eraserlog table.