Reports
ActionKit captures a lot of information about your users and your campaigns in your database. The Reports Tab provides your staff an accessible interface for analyzing and working with that data.
You can select from an extensive library of built-in reports that you can use as-is or customize. There are even reports for customizing data displayed throughout your ActionKit admin.
Or, you can create your own reports. There are two report types: Query Reports return one result set, while Dashboard Reports bring several query results together on one screen and are written in HTML.
Write Query Reports using our Query Builder tool or by writing your own custom SQL.
You can schedule your reports to run on a regular basis and email them to others. You can also download the results of query reports as CSV or TSV files.
Alternatively, you can access your data directly through a MySQL connection if you’ve requested an account.
Running Reports
Running reports is pretty much point and click, though some reports require the user to enter input parameters first and provide additional breakdown and download features.
To run a report:
1 On the Reports Tab, click Browse All to see a list of all reports, or enter the name of a report in the search box in the upper right corner of the screen.
2 Click Run or on the report name. Reports that do not require user input run immediately.
For reports that require input value(s), enter the value(s) in the input field and click Run Report.
3 From the report display, you can:
Enter one or more email addresses and click Submit to send the results if you don’t want to stay on this screen while the report completes.
For query reports only, you can also download the results. Click the Email or Download Results link and then select from the options for format, file zipping, and whether you want the file emailed. When you hit Download the CSV/TSV will be created and a link will appear when it’s ready for download.
When the link appears, you also have the option to export the results to Google Sheets. If you choose to have the file emailed to yourself, you can leave the page and the results will be emailed to you as a table when the report is finished.
Note
The first time you export your report results to Google Sheets, you’ll be prompted to give ActionKit access to your Google Sheets and Google Drive so that ActionKit can create a spreadsheet in your Google Drive account.
Alternatively, you can schedule your reports to run automatically and send to one or more email addresses, see scheduling queries and scheduling dashboards.
Note
You’ll get an error message if you try to download a report that exceeds 1024MB. Usually that means there’s a mistake in your SQL, but let us know if this limit is causing you a problem. Also, if you try to display a report with more than 10,000 rows, we’ll prompt you to download a CSV instead.
Note
Google Drive will reject files larger than 25MB from being uploaded; if you try to export report results larger than this, we’ll prompt you to download a CSV instead.
Entering Input Parameters
Some built-in reports require you to enter a page number or name or other information so the report can find the stats for that object. These user-entered values are called input parameters.
In most cases, you can enter a single value or a comma-separated lists, like a list of zip codes. However, if you wish to include a list of values with letters as well as numbers, like congressional districts (e.g. CA_04; CA_03), the values must be separated by ; or new lines.
Many reports that provide results for multilingual campaigns or that request the user to input page or mailing id parameters provide an autofill box where you can type in part of the page or campaign name or id and then click to select from a list of matches. For example, “click on page but no action”, requires you to enter a page id or partially enter the name to find matches by page name or campaign name.
To use a parameter value in a query report, reference it within the report SQL, like:
select * from core_mailing where mailing_id in ( {{mailing_id}} )
The parameter name can include alphanumeric characters, underscores, and hyphens, and wrapped in {{ }}. The parameter name will be used to prompt the staff user for the value. In the query builder, you can leave the value of a filter blank, and the parameter name will be filled in automatically. In both SQL and the query builder, the query report will prompt you to enter a value.
Learn More: Input Parameters
Breakdown By Page Or Mailing
If you pick a campaign from the autofill choices (“campaign” is appended to the page name) or enter a list of mailings or pages, ActionKit will break the results down so you’ll see a total for the campaign and a subtotal for each of the pages or mailings.
If you only want to see the total, uncheck the Break down results box. The choice you make will apply to CSV downloads for query reports as well.
This works for most query and dashboard reports, although there are a few exceptions (like the Event Report dashboard and the query reports it uses - for the technically minded reader we had to add some new Django tags to build this report and the breakdown feature doesn’t work with those).
Built-in Reports
ActionKit comes with a number of built-in reports for analyzing your data. Read more about these reports, including descriptions of some of the most commonly used, in the built-in reports section. You can edit the built-in reports to fit your needs.
Below you’ll find information about special reports that we’ve turned into buttons in the toolbar on the right hand side of the reports Tab.
Download Actions
The Download Actions tool lets you easily download a CSV of the entries made on a survey page, or the entries in a custom action field on another page type. You can also use this to generate a list of actions taken on non-survey pages, whether or not the page has associated action fields using the short name option.
To generate the CSV:
1 Click Download Actions in the Reports tab tools menu.
2 Select a Page - Enter the short name for a survey or non-survey page.
3 Choose the options you’d like to enable.
If you don’t make any selections, you’ll get a CSV file with earliest responses at the top and with columns for the page name, action id, user id, answers to each survey question or action field, and the timestamp.
Or select any combination of the following options:
Reverse Order - Download responses with most recent responses first.
Optional Information -
Include respondent name, full address, district, phone - these fields are appended to each row with whatever values we have for the relevant user.
Include respondent email - email will be appended to each row.
Include action source and mailing ID - action source and the mailing ID recorded on the aciton will be appended to each row.
Include custom fields - selected user fields will be appended to each row.
Limit to date range - select from and to dates from the calendar that appears when you click in the box. The date range will be shown in the file name.
4 Click Download Actions to generate your CSV or click show SQL to display the query generated from your selections.
Note
For surveys, only questions that have a response from at least one user will be shown. Given this, if you don’t see all the questions you expect, try submitting a test entry for that question yourself, then make sure the html for each survey question is correct. Read Survey page features for more information.
Compare Mailings
The Compare Mailings report allows you to quickly compare results from two or more mailings. Use this for mailing testing or to view recent performance or performance by tag.
To compare mailings:
1 Click Compare Mailing in the Reports tab tools menu.
2 Select the mailings you want to compare. Recent mailings can be selected from a dropdown in the top box. To include an older mailing, type a word from the subject or the mailing ID in the second box.
The dropdown includes mailings that stopped or died. These mailings sometimes have sent to a set of people before they died or were stopped so it can still be useful to see the results in a comparison.
3 Hit Compare.
You’ll see various measures of performance for each mailing. In addition to the open, click and action stats available in the individual mailing report, you’ll see the average gift size and the mailing sent date, plus unsub and bounce stats.
Scroll down to see information on the statistical significance of your test results. There’s a table and definitions of terms to help you determine whether the performance difference between two or more mailings is statistically significant.
Compare Pages
The Compare Pages report allows you to quickly compare the performance of two or more pages.
To compare pages:
1 Click Compare Pages from the Reports tab tools menu.
2 Select the pages you want to compare. Recent pages can be selected from a dropdown in the top box. To include an older page, start typing in the second box. In either box, start typing any of the following to see matches: title, page id, page type (e.g. ‘petition’).
3 Hit Compare.
You’ll see various measures of performance for each page, most importantly, conversion rate (actions/clicks). A higher conversion rate means more of the people who come to the page then take action on the page. The total numbers (actions, distinct users taking action, new members from this page) are interesting, but often less useful for comparing pages, because they often say more about the size of the audience (a page that was included in a full base email will generate more actions than a page that was included in an email to 10% of your list).
Query Reports
Queries are requests for information from your database. They can be used to answer questions both simple and complex about your mailings, campaigns, fundraising, users and lists. Query reports allow you to create a query that can then be run and the results viewed and shared with others via the admin.
You can write your own query or use the Query Builder to generate SQL for certain types of reports.
Database Structure
We’ve provided a database table reference with table names, field names, and brief descriptions. You’ll need this information to write your own SQL. You may also find it useful for understanding what data is available and for more advanced uses of the query builder.
Additionally, we’ve provided a more detailed reference for some more complicated categories, particularly donations and subscriptions, under Data capture details by category.
You can also access this document through the Reports > Related Tools > Database Table Reference.
You can also reference the Sample queries for examples of how the different tables can be joined.
While creating a query report, you can click the Tables link above the SQL field to show a list of database tables and columns. Enter one or more words in the search form to focus on matching tables. Click a table or column name to insert it into your SQL.
Creating And Scheduling
If you want to write your own query reports, you can either use the Query Builder tool or write your own Custom SQL.
You can start from an existing query by selecting copy next to the report name from the Browse All listing.
Or to create a new query from scratch, click Add a Query in the Reports tab and enter the following information:
Name - Title of the query, ideally short and descriptive (like "New Members by Week"). This is a required field.
Short name - This is the name that you use to reference a query report in a dashboard report (see Creating a dashboard report) and is included in the URL for this report. This is a required field.
The short name must use letters, numbers, and underscores without spaces or other characters. Although dash characters are allowed in short names, they are not supported by the syntax used to embed query reports in a dashboard report, so if you’d like to separate words for readability, we suggest using underscore instead.
Description - You can provide more detail about the query here (like "New member count from Mon thru Sun of each week"). The description is equivalent to Notes on pages and mailings.
Query Type - There are multiple query types. The default value is Custom SQL.
To use the point-and-click Query Builder to generate your SQL, select any other query type from the dropdown.
Less advanced users will be more comfortable using the Query Builder but note that there are some queries that it will not be able to create, and the SQL it generates may not be as efficient as one written by hand.
SQL - The query written in SQL. If you use the query builder the SQL will be generated for you.
You can use many Django template tags in your reports and also custom tags we’ve added for ActionKit. By combining if/else template tags with input parameters, you can create reports that vary their SQL based on input by the person running the report.
Query Template - Select from various layouts for your report. You can add a new one by clicking the green plus symbol and writing the HTML for your layout. This is a required field. For more information, see Managing query templates.
Categories - You can filter reports by the category selected here on the Browse All screen. Some categories cause reports to be available in other areas in the UI. See Managing report categories.
Parameter help - Enter instructions for other staff users for reports that require input parameters. When the user runs this report, they’ll see a screen prompting them to enter the variable value and these instructions will show on the page. For an example of how we’ve used it see the Recurring Donation Monthly Report. This is an optional field.
Schedule and Emailing - To view the schedule and emailing options, click Show. Then select an option from the Run every dropdown.
Note
If you try to schedule a report that requires a user input parameter you’ll see an error message. This does not apply to the {{ last_run }} and {{ now }} tags.
Additional options will show based on your selection:
Hour - Runs every hour. No additional options.
Day - Runs daily at the time you select from the Time of Day dropdown. Times are in GMT with no daylight savings.
Week - Runs weekly on the weekday you select under Day of Week at the time you select under Time of Day.
Monthly - Runs monthly on the Day of Month you select at the Time of Day you select. Enter -1 if you want the report to run on the last day of each month.
You can set scheduled reports to send to a list of email addresses each time they run.
To emails - Enter one or more email addresses for people who should receive a copy of the report at each scheduled run.
Email style - Email the report as an attached CSV or as HTML by selecting one of the following options:
Email results as HTML using display style your specified as the query template
Email results as a CSV file.
If your query returns more than 1,000 rows, it will always be sent as a CSV file.
Your choice applies to both scheduled reports and reports sent by the form on the report-viewer page.
Send if no rows - Check if you want email recipients to receive an email even if there are no results for scheduled reports. This option is activated by default.
Using Queries To Target A Mailing
You can use query reports to target recipients for your mailings. Any query report categorized mailer will display in the Query Library field on the Target screen in the mailer. Below, we list the sample queries we’ve included in your instance and outline how to add your own queries.
Built-in Query Library Reports
The sample queries below are built in to your instance. You can edit these. If you remove the mailer category, the query will no longer display in the Query Library. The original versions can be viewed in the report reference.
The built-in queries are:
Attendees of upcoming events - Users who are signed up to attend the events in the campaign you enter in the query pop up box, excluding attendees whose events are all in the past.
Click on Page but no Action - Anyone who followed a link in a mailing to the page you specify but who didn’t submit on that page.
Donors whose cards expire next month - List of users having active recurring donations whose credit cards will expire next month.
Donors whose cards recently failed - List of donors whose cards failed last month (who have not created a new recurring donation profile).
Hosts of upcoming events - Users who are signed up to host the events in the campaign you enter in the query pop up box, excluding hosts whose events are all in the past.
Major Donors - Anyone who gave over $250 in the last year.
New Users from Page - Users newly subscribed to any of your lists by the action they took on the page you enter in the query pop up box. You can modify this report or use it as the basis of a new report to find users added to your database by their action on the page.
New-to-database users - Users added to database n days ago. This query finds users who took their first ever action with you in a single 24 hour period, not in the last n days.
New-to-list users - Users subscribed to the list you specify n days ago, where you also specify n. This query finds users who joined in a single 24 hour period, not in the last n days.
People who recently received a recurring series - Excludes recent recurring mailing recipients. For “days”, enter 1 to exclude those mailed in the past 24h, 2 for 48h, etc. You can enter a specific
recurring_schedule_id(notmailing_id) or leave blank to exclude people who received any recurring mailing.Recent Donors - Anyone who gave in the last 3 months.
Super Actives - This selects users in any of three categories: users who took the number of actions you specify in the query pop up box in the last 3 months, users who ever hosted an event, or users who donated over $250 in the last year. You can use your own definition of super actives by changing the query. For example, you could change it to include anyone who donated over $100 or to include anyone with x actions in the last 6 months or to add a criteria for anyone who signed up as a volunteer.
Survey Respondents by Question - Anyone who answered a particular survey question, regardless of the value they entered.
Users by Source - Anyone whose first action had the source you specify (for example ‘website’ or ‘taf’).
Users Who Received Mailing Test - Users who received a specific A/B test variation of a mailing.
Users by UserField Value - Anyone with the value you specify in the userfield you specify. For example anyone who entered ‘doctor’ in a userfield ‘occupation’.
Users who Clicked Mailing - Anyone who clicked a link in the designated mailing.
Users who Opened Mailing - Anyone who we know opened the designated mailing.
Weekly slice of list - For recurring mailings meant to gradually trickle out to your list. ‘Modulus’ is the number of slices: enter 52 (not 1/52) to hit each user yearly, 26 for every six months, 13 for quarterly. Weekly sends shouldn’t use a multiple of 7 for modulus.
Adding Your Own
You can also add your own queries to the library. Any query report associated with the mailer category is available in the query library.
Mailer reports must be single statement queries. Note that SET SQL_BIG_SELECTS=1 is already automatically ON for all mailer queries so you don’t have to include it yourself.
The mailer will automatically exclude any users who aren’t subscribed, so you don’t need to include this in your query. But you’ll be able to compare your count from the report with the count from your mailing if you join to core_user where subscription_status='subscribed'.
These queries can include input parameters. The staff user who targets the mailing will need to enter the appropriate value in the query pop up box.
Refresh Setting
Every query with the mailer or merge categories has a Refresh setting that other query reports don’t have. By default, daily is selected. This tells the mailer to cache the results from the report and reuse them for 24 hours, rather than running it again every time you rebuild a mailing that uses it. This is a good choice for slow reports. If your targeting needs results that are fresher than that, you can change this to hourly to reuse results for an hour, or to every time to not reuse the results at all. In the other direction, weekly is good for things that aren’t changing quickly and are slow to calculate.
If you set Refresh to daily, an option for Daily rebuild time will appear. This allows you to specify the time of day that the report will be rebuilt each day. If you’ve set a timezone preference, the time will be displayed in that timezone. You can also leave the time blank and the report will be rebuilt automatically before expiration.
Some things to keep in mind when using the Refresh setting:
This caching is never used when running reports. It’s only for mailing targeting. Consequently, running the report manually will not cache it. You can cause a report to be cached by using it in a mailing’s targeting and rebuilding the mailing.
Cached reports that are used in recent mailings will be regenerated in the background so that you don’t have to wait for them to run when they expire. However, this can only work if your report is able to run in the time frame allotted for the refresh, which is 10 minutes for hourly cached reports and 2 hours for the other settings.
Multiple mailings will use the same cached result if possible, but if the report takes parameters then each combination of parameter values will be cached separately.
Changing a report’s SQL will invalidate all cached results for the report as well as all draft mailings that use the report.
At any point, you can manually clear the cache using the link under the Refresh selections on the query report editing screen.
For mailer queries that are set to use caching, you will also see an option for Subscribed users only, which is on by default. This removes unsubscribed users from your cached results, to help your mailings build faster. Unsubscribed users are always removed as the final step in building a mailing, but some groups have a large number of unsubscribed users who match their mailer reports, leading to significantly slower builds if those users are left in. If you’re already limiting to subscribed users in your report’s SQL, this won’t have any effect. (This option is not available for merge queries.)
Dashboard Reports
A dashboard report allows you to present the output of one or more query reports on one screen and format it using HTML. You can also employ Google charts tags to convert the output of one or more query reports into bar, pie, and other Google charts. Dashboard reports are flexible and can execute JavaScript, contain arbitrary HTML, and use Django template tags and filters.
The process for creating a dashboard is very similar to the process for creating a query report with some exceptions:
You enter HTML for the dashboard report instead of SQL for the query.
You enter HTML to format the output instead of selecting a query template as is done with query reports.
Input parameters are defined and required differently.
Dashboard reports include the HTML for the display, so you can’t download a CSV of a dashboard report.
Creating And Scheduling Dashboard Reports
To create a dashboard report, click Add a Dashboard in the Reports tab and enter the following information:
1 Name - Title of the report, ideally short and descriptive (like "New Members Dashboard"). This is a required field.
2 Short name - This is the name that is included in the url for this report. The short name must be one word using letters, numbers, underscores and dashes, no spaces or other characters. This is a required field.
3 Description - You can provide more detail about the dashboard report here (like "New member from all sources for the last month").
4 HTML - The HTML for the dashboard. You can use standard HTML tags to format the output or reference a stylesheet. Django and JavaScript are also allowed in the dashboard.
Include query reports by inserting the following into your HTML at the desired location: If the dashbard is passing parameters to the query report through user input or a parameter in the dashboard, use
{{ reports.query-short-name }}. If the query report doesn’t need additional input to render, use{% report "query-short-name" %}.If the query report you reference requires user input(s), you will need to define each parameter in your dashboard report. You can prompt for the user input or fill in the parameter directly in the dashboard:
<!--Prompt for user's pet-->
{% required_parameter "animal" %}
{% report "query-short-name" animal as user_pet %}
<!--Always use cat as user's pet--> {% report "query-short-name" "cat" as user_pet %}For detailed instructions, see input parameters.
You can also use Google charts to convert the output to a visual representation.
<div class="google-chart ColumnChart">
  {{ reports.clicks }}
</div>
In the example above, the class
ColumnChartindicates that the chart will be a column chart. See other Chart Types. For detailed instructions, see Using Google Charts.5 Categories - You can filter reports by the category selected here on the Browse All screen. Select homepage to list the report in the reports section on your home tab and on your reports tab. For more information, see the report categories reference.
6 Parameter help - Enter instructions for other staff users for reports that require input parameters. When the user runs this report, they’ll see a screen prompting them to enter the variable value and these instructions will show on the page. This is an optional field.
7 Schedule and Emailing - To view the schedule and emailing options, click Show.
Run every - You can schedule reports to run every hour, night, or week.
To emails - You can enter one or more email addresses for people who should receive the report at each scheduled run.
Note
Reports that require a user input parameter should not be scheduled because the report can not run without user input. Including relative references (like 7 days ago instead of an absolute date) may help.
Input Parameters
Input parameters allow you to prompt the person running the query report or dashboard to enter a value.
If your dashboard relies on query reports that require user input, then you will need to define each parameter in your dashboard report. You may also define parameters for query reports and dashboards if you want to include additional attributes, such as hint text or a default value.
Defining Parameters
For dashboard and query reports, we’ve added a tag, {% required_parameter "parameter_name" %} that allows you to require the person running the report to enter a value. The value is then saved in the report context and can be used by query reports that are part of your dashboard.
The built-in Event report provides examples. As you can see there, you include this statement to tell ActionKit what parameter the query reports require: {% required_parameter "parameter_name" %}.
You can give multiple {% required_parameter "[parameter_name]" %} statements. Note that the parameter name can only include alphanumeric characters, underscores, and hyphens.
You can provide additional information about a parameter by including a series of attribute-value pairs after the parameter name:
{% required_parameter "date_start" label "Start Date" type "date" %}

{% required_parameter "max" label "Maximum" type "number" default "5" %}

{% required_parameter "tags" label "Pages With These Tags" order 1 hint "Leave blank to match all pages" %}
The supported attributes are:
label: Provide a human-readable name for this parameter. If no label is provided, one is constructed by replacing underscore characters with spaces and capitalizing each word.
hint: Provide an optional additional set of instructions to be displayed under the parameter-entry field.
type: Select the style of input field used for this parameter; should contain one of the following values:
text (default): An expandable multi-line text field.
number: A numeric input field.
date: A text input field with a date-picker widget.
default: Provide an initial value to be shown on the parameter form. Users can edit this value or accept it as-is.
min: Provide a minimum value for form validation. Only used with type set to number.
max: Provide a maximum value for form validation. Only used with type set to number.
order: Specify where in the list of parameters this item should appear. Parameters numbered 1, 2, 3, and so on will appear at the top of the list, followed by parameters without an order value. (You can use negative order values to push a parameter to the end of the list.) If multiple parameters have the same order number, they will appear in the order they are encountered in the report.
{% required_parameter "since" label "Join date" type "date" default "2018-01-01" %}
The example above will provide a date picker labeled Join date defaulting to January 1, 2018. When the user selects a date, it will be used as the parameter wherever since appears in the report.
Note
Special Input Parameters Use one of the following parameter names, to get a friendly autocomplete box: page_id, mailing_id, callpage_id, tag_id, list_id, user_id, event_id, campaign_id, or target_id
Using Parameter Values In Reports
You can then insert the parameter value directly into your query or dashboard reports.
To use a parameter value in a dashboard report, reference it within the report template, like:
<h3>{{ campaign_name|campaign:"title" }} ({{ campaign_name }})</h3>
 {% if campaign_name|campaign:"starts_at" %}
 The default start time is {{ campaign_name|campaign:"starts_at" | date:"r" }}
 {% endif %}
Passing Parameters From Dashboards to Included Reports
Sometimes, you’ll want to use the value of one parameter throughout your dashboard, even when the included query reports call for parameters with different names. You can tell query reports to use the parameter_name with this syntax:
{% report "[query_short_name]" with [parameter_name] as [name of parameter required in query report] %}.
To pass more than one parameter to a query report, just give them in sequence like this:
{% report "[report_name]" with [parameter_1_name] as [p1] [parameter_2_name] as [p2] ... %}
Using Google Charts
You can use Google Chart API to format your dashboard output as charts for better visualization. You can display query report results using Google Charts to see line, bar, and other types of charts in your dashboard instead of tables. You can also display query report results as a Google Table which would add things like sortable headers.
To create a dashboard report suitable for display as a chart, the referenced query report can be whatever you want, but for it to be interesting you’ll want it to return multiple columns for multiple rows. Also, most chart types will expect numeric values in all columns but the first.
Here is the SQL query for the built-in Count clicks by Page report with the short name of clicks that counts the number of clicks by page for the last month:
SELECT name, COUNT(*)
FROM core_click cc
JOIN core_clickurl ccu ON ccu.id=clickurl_id
JOIN core_page p ON p.id=page_id
GROUP BY 1;
To create a Dashboard Report that utilizes google charts for this query, wrap the query short name in the google-chart div class:
<div class="google-chart ColumnChart">
{{ reports.clicks }}
</div>
The google-chart div class tells ActionKit that it should try and find a report results table inside the div and make it into a chart. ColumnChart is the type of chart. See Chart types.
When ActionKit renders this Dashboard Report, the new dashboard report should show up as a column chart.
Chart Types
ActionKit supports all the core types in the Google Chart API gallery, in particular AreaChart, BarChart, ColumnChart, GeoChart, LineChart, PieChart, and Table types.
Not all chart types have been tested, so if a particular type does not seem to be working, please contact us.
Chart Styles
You can use standard CSS to style many aspects of a chart.
In particular you may want to set the height and width of a chart’s div:
<div class="google-chart ColumnChart" style="height: 300px; width: 600px">
{{ reports.actions_by_page }}
</div>
Chart Options
Google charts have many options for configuring the appearance and behavior of charts - please refer to Google’s documentation for explanation of the options for each chart type.
There are two ways to specify options for a chart in ActionKit.
The first is to use javascript to set the options in a property of a global reports variable. Your chart div must have an id which is used as the property name. Here’s an example:
<div class="google-chart ColumnChart" id="actions_by_page_chart">
{{ reports.actions_by_page }}
</div>

<script type="text/javascript">
reports.actions_by_page_chart = {
  options: {
    title: 'Actions By Page (last 7 days)',
    hAxis: { title: 'Month' },
    colors: ['#ffcc00'],
    height: 300,
    width: 400
  }
};
</script>
Note that you can also set width and height as chart options.
You can also set options by giving your chart div a getOptions attribute which is the name of a javascript function you’ve defined to supply the options. It looks much like the above.
<div class="google-chart ColumnChart" getOptions="getByPageOptions">
{{ reports.actions_by_page }}
</div>

<script type="text/javascript">
function getByPageOptions() {
  return {
    title: 'Actions By Page (last 7 days)',
    colors: ['purple'],
    height: 300,
    width: 400
  };
}
</script>
Google charts can be used in conjunction with report parameters:
{% required_parameter days %}
<div class="google-chart ColumnChart" getOptions="getByPageOptions">
{% report 'actions_date' with days as Days_for_Date_and_Time_Created_Updated %}
</div>

<script type="text/javascript">
function getByPageOptions() {
  return {
    title: 'Actives in last {{ days }} days',
height: 500,
    width: 700
  };
}
</script>
Building Tables
You can set up a chart inside a dashboard report by creating an HTML table and filling in individual cells. As an example:
<div class="google-chart ColumnChart">
<table>
   <tr><th>Month</th><th>Donations</th></tr>
   {% for month in now|months_pastyr %}
   <tr>
     <td>{{month|month_year}}</td>
     <td>{% report "donations_by_month" with month as month %}</td>
   </tr>
   {% endfor %}
</table>
</div>
Note
Running a report such as this with many values may be computationally expensive, and will make your reports slow. (Also we may disable or ask you to rewrite a slow report if it impacts overall system performance.)
Notes And Limitations
Here are some tips and ways in which you might want to use the charts, and also what they can’t do.
Query Templates - You can create a Query Template that includes any Google Charts type (e.g.
<div class="google-chart LineChart">...</div>) so that query reports using that template will always display as a chart. Otherwise any custom query templates to be used with charts should generate HTML tables.Report results page - Charts will only display on the report results page, not on dashboards or elsewhere in the ActionKit admin.
Email - Google charts should show up in the emailed version of a report as inline image attachments, with the exception of Table visualizations and very large charts. Dashboards that are categorized wawd_standard, or dashboards that use ActionKit’s automatic chart creation shouldn’t require any changes. To email other charts, place them within a
divthat has a class ofgoogle-chart. To avoid styling issues affecting email display, you can set the width and height of a chart using options. In CSS, have a style selector apply the style to just chartdivsinside the reports page:
<style>body.reports div.some_chart { height: 200px, ... }</style>
Troubleshooting - * Make sure individual query reports work, and are visible as tables, before adding them to dashboard reports. * To track down problems in dashboard reports, it may help to temporarily remove the
google-chartclass from the chartdiv(or change it to something likeno-google-chart) and verify that reports render correctly as tables. * Some errors may be logged to the javascript console, if it’s enabled. * Make sure you test your reports before including them in the dashboard. * Test one change at a time when building your report. “Report failed” errors can be difficult to troubleshoot if you’ve made many changes at once.
Managing Reports
Browse All
The Browse All button in the Reports tab brings up the full list of all reports (queries and dashboards). Alternatively, use the search box or the built in filters to view a list of specific reports on this screen.
From this listing of all reports, you can:
Filter reports by category or type using the toolbar on the right. Available options for filtering by type are: All, Query, and Dashboard.
Search by key word and sort the list by specifying Order By and Descending or Ascending and clicking Search.
Show hidden or disabled reports by clicking Show Hidden.
Remove a report by clicking Hide.
Create a new report by coping an existing report.
Bulk edit reports to show/hide reports or add/remove categories from reports.
Search
Type a word or phrase in the search box and ActionKit will display a list of the reports that have that word or phrase in the name, short name, category, or description.
You can also use the search feature within the Browse All page to do keyword search and arrange the order by multiple criteria.
Bulk Editing
For Reports, you can hide reports, show hidden reports, add and remove categories from reports in bulk.
Minidash reports are a special case - you can hide them, but since those reports display on your primary tabs, we use them whether or not they’re hidden.
To bulk edit:
1 From the Browse All screen (or from the Event List screen for events), click on the “Bulk Edit” link in the top left next to “Show Hidden”.
2 Choose the items that you want to apply the action to – you can click to select specific items, or select all items visible on the screen.
3 Click the Save button, review the count of objects to be changed, and confirm.
You’ll then see a reportback with the number of changes actually made. This may differ from the preliminary count if, for example, an object you try to apply a tag to already has that tag.
Customizing the Admin Interface
You can control which reports are highlighted on the Reports Tab:
Report tags - To control which reports show up in the “Key Reports” list on your Reports Tab, add the
homepagetag to the report.
A few special reports control stats displayed in your admin interface:
Your Progress - The results of this report display on your home page.
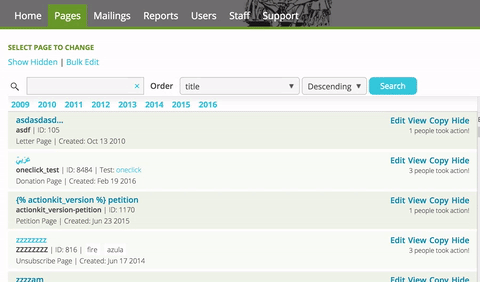
Page mini-dashboard - This report generates the stats displayed on the Pages Tab. Under the available actions for each page (e.g. “Edit Copy View Hide”), you’ll see a count of action takers, if you’re using the default report. You can copy and edit this report to show a count of new users, total donated, action sources or whatever page-related info is most useful for your organization. You can even provide links to more detailed reports here. You may want to consider using different content per page type: Using Custom Template Tags.
One-line mailing stats - This report generates the stats displayed on the Mailings Tab for Sent Mailings. The default shows a count and a % of opens and clicks. As with the report describe above, you can copy and edit this report to change what shows here.
And some reports provide mailing statistics for recurring mailing series and are linked to from the Mailing Report screen of a recurring mailing. These are Recurring series statistics, Per-send recurring mailing statistics, and Recurring mailing clicks breakdown.
There are also a few special names you can give to your own reports to further customize your admin interface:
Draft Mailing Dashboard Report - If you name a report
draft_dash, it will be displayed on the draft mailing proof-and-send screen, receiving the current mailing’s ID as amailing_idparameter.Sent Mailing Dashboard Report - If you name a report
mailing_dash, it will be displayed on the sent mailing report screen, receiving the current mailing’s ID as amailing_idparameter.User Dashboard Report - If you name a report
user_dash, it will be displayed on the individual user record screen, receiving the current user’s ID as auser_idparameter.User Stats Mini-Dashboard - If you name a report
user_minidash, it will be used to generate the summary stats displayed on the Users Tab and the user listing screen, receiving the current user’s ID as auser_idparameter.
Event Mini-Dashboard - If you name a report
event_minidash, it will be displayed for each event on the event listing screen, receiving the current event’s ID as aevent_idparameter.
User Updaters
User Updaters allow you to easily maintain your users’ custom user field data, which is especially useful for targeting mailings by custom user field data.